Preparing your Image file for Giclee Printing
Choosing a suitable File Format
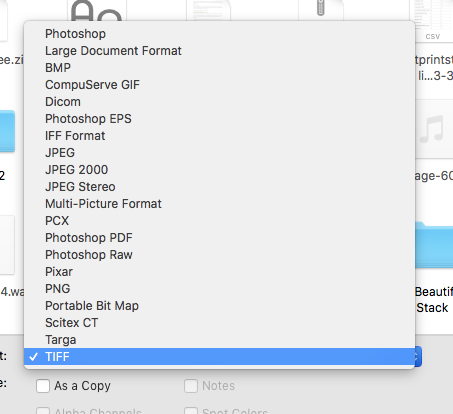
The first step when preparing your image file is to choose a suitable file format for printing with. At Fine Art Print Studio, we can accept RGB Files in either Jpeg, PNG, or TIFF file format. If you have a choice of format when you are working on your image files we recommend TIFF format for highest quality printing. Please note that when saving the file in this format you may be asked about using file compression. DO NOT USE ANY FILE COMPRESSION when saving your file. Although this will reduce the file size the compression used will also lower the dynamic range of the image file leading to a reduced quality in print output.
Using an ICC Colour Profile
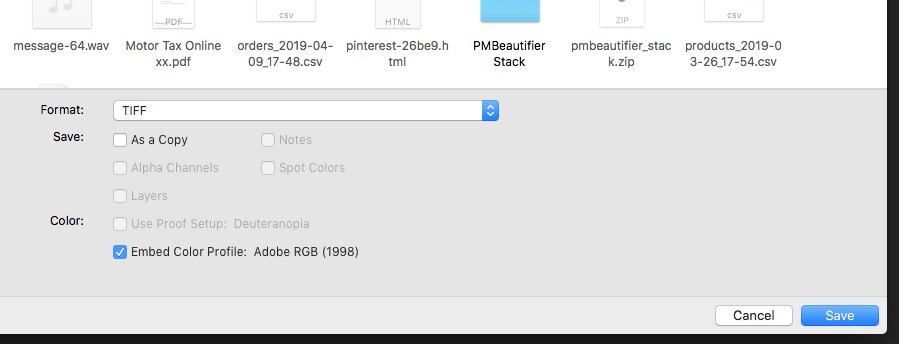
An important part of producing a Fine Art Print is obviously colour. You will want your print to match as closely as possible to the original artwork. Remember it is not possible for digital devices to precisely match each other in colour output unless you are using calibrated devices. If colour output is important to you then we recommend using a monitor calibration tool to calibrate your screen. This will allow you view a much more accurate representation of the colours contained in your digital file. Since colours can look different from one device to another it is important for us to know what colour space the file was created in. We use this information contained in your file during the printing process. When saving your image file using a colour managed image editing application (for example Photoshop) you should alway check the embed colour profile box. This will automatically embed your file with the colour space that was used to create the file. Our printers will be able to read this profile and convert the colours from this colour space in to the printer colour space. Colours that can not be reproduced by the printer will be re-mapped to a closely matching colour.
What Colour Space should I use?
If you are outputting your image for the first time from your camera or scanner, you may have options for selecting a colour space output. In this case we would recommend ProPhoto colour space or Adobe RGB 1998, in order of preference. However if the image file has already been created there is no advantage changing your colour settings from one colour space to another. If the file is already using a narrow colour gamut (which has a restricted number of available colours) then changing the space to a wide gamut space (One that contains lot's of available colours) will not add any additional colours to the file. This is something that needs to be done during the original digital image capture. For example many digital cameras allow you to shoot in camera RAW mode. This is a wide gamut space. When you are converting your image file from this RAW format this is when you need to select your wide gamut colour settings. By doing this you will be retaining the maximum amount colours in the image file, thus allowing our printers access this colour data during the print process. At fFine Art Print Studio, we capture all artwork using RAW digital files and then convert this RAW file in to a High Resolution TIFF File with a wide gamut RGB Colour profile. This will maximise the amount of colour data we can print. We also use some additional steps to calibrate the cameras at time of capture to avoid colour inaccuracies often caused by camera sensors (All digital camera reproduce colour slightly differently). My measuring this difference we can build a profile to correct the digital file making an excellent file for reproduction.
What if I don't have a monitor calibration tool?
Many of our customers (actually the majority) do not have monitor calibration tools and we still produce prints that they are delighted with. The information that we give above is really designed for people requiring a high level of accuracy. If you do not have a Monitor Calibration Device, we still recommend that you use the above file output settings. If we have a file with an embedded ICC profile this will always be the best starting point in producing a good print. If you are planning on producing a large number of prints for sale then it's always a good idea to have a smaller test print made first. This way you will see exactly how colours will be reproduced using your own specific file. You can also order two copies and request one to be adjusted by us to make the most aesthetically pleasing print we can. Obviously this process is subjective but by viewing both versions side by side, you decide to use our version for making your entire edition. This file can be saved on our system for future use so you will have guaranteed consistent results from the 1st print to the end of edition!
Naming your file
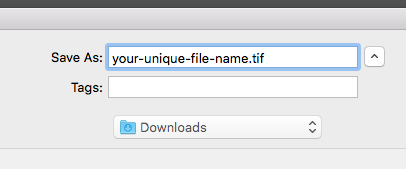
When saving your file, we ask that you give each image a unique file name. For example if this work is going to be titled then please save the file with the actual title name for the piece.
Important; When saving your image file please use a unique filename. Sending multiple images with the same name will simply overwrite the files on our file server and we will not be able to access the different files.
Sending us your files
After placing your first order on the website we will issue you with your own personal file upload link. This link is sent via email and should be saved (or you can bookmark the page when opened to make it easy to find whenever you are sending us your files. For customers that make regular prints from the same files, we can keep copies in your personal folder. Please save each file with a unique title so that it can be easily referred to when placing an order.